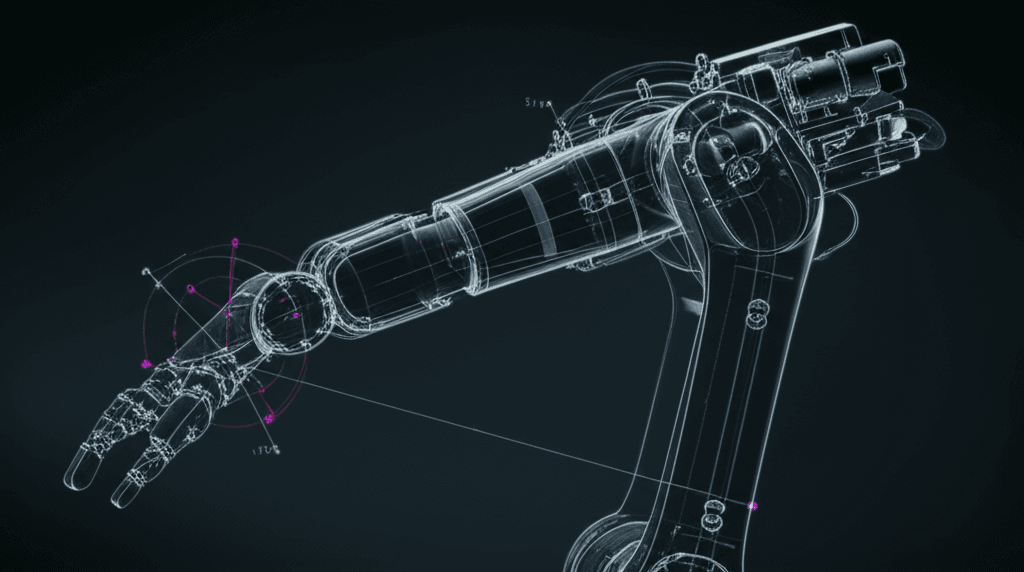
Introduction to Robot Kinematics: Understanding How Robots Move
Prerequisites
- ✓Basic Python knowledge
- ✓High school trigonometry
- ✓Understanding of coordinate systems
Robot kinematics is the study of how robots move — without worrying about the forces involved. If you want to tell a robot arm to pick up a cup, you need kinematics to figure out what angle each joint should be at.
What You'll Learn
- The difference between forward and inverse kinematics
- How to represent robot joint configurations
- Denavit-Hartenberg (DH) parameters
- How to build a 2D robot arm simulator
- Workspace analysis for robot arms
Core Concepts
Forward Kinematics (FK)
Forward kinematics answers: "If I know the joint angles, where is the end-effector (gripper)?"
This is the simpler direction. Given joint angles, we can calculate exactly where the robot's hand ends up using trigonometry and matrix multiplication.
Inverse Kinematics (IK)
Inverse kinematics answers: "If I want the end-effector at position (x, y, z), what should the joint angles be?"
This is harder because:
- There may be multiple solutions (different poses reaching the same point)
- There may be no solution (point is out of reach)
- The math gets complex for robots with many joints
Step 1: Set Up Your Environment
pip install numpy matplotlibStep 2: Build a 2-Link Robot Arm
Let's start with a simple 2-link planar robot arm:
import numpy as np
import matplotlib.pyplot as plt

class TwoLinkArm:
    """A simple 2-link planar robot arm."""

    def __init__(self, link1_length=1.0, link2_length=0.8):
        self.L1 = link1_length
        self.L2 = link2_length

    def forward_kinematics(self, theta1, theta2):
        """
        Compute end-effector position from joint angles.

        Args:
            theta1: Angle of first joint (radians)
            theta2: Angle of second joint (radians)

        Returns:
            Dictionary with joint and end-effector positions
        """
        # Joint 1 position (elbow)
        x1 = self.L1 * np.cos(theta1)
        y1 = self.L1 * np.sin(theta1)

        # End-effector position
        x2 = x1 + self.L2 * np.cos(theta1 + theta2)
        y2 = y1 + self.L2 * np.sin(theta1 + theta2)

        return {
            "base": (0, 0),
            "elbow": (x1, y1),
            "end_effector": (x2, y2)
        }

    def inverse_kinematics(self, x, y):
        """
        Compute joint angles to reach target position.

        Uses the geometric (analytical) approach.

        Returns:
            Two solutions: (theta1, theta2) for elbow-up and elbow-down
        """
        # Distance from base to target
        d = np.sqrt(x**2 + y**2)

        # Check if target is reachable
        if d > self.L1 + self.L2:
            raise ValueError(
                f"Target ({x:.2f}, {y:.2f}) is out of reach! "
                f"Max reach: {self.L1 + self.L2:.2f}"
            )
        if d < abs(self.L1 - self.L2):
            raise ValueError(
                f"Target ({x:.2f}, {y:.2f}) is too close! "
                f"Min reach: {abs(self.L1 - self.L2):.2f}"
            )

        # Apply law of cosines for theta2
        cos_theta2 = (d**2 - self.L1**2 - self.L2**2) / (
            2 * self.L1 * self.L2
        )
        cos_theta2 = np.clip(cos_theta2, -1, 1)

        # Two solutions: elbow-up and elbow-down
        theta2_up = np.arctan2(
            np.sqrt(1 - cos_theta2**2), cos_theta2
        )
        theta2_down = np.arctan2(
            -np.sqrt(1 - cos_theta2**2), cos_theta2
        )

        solutions = []
        for theta2 in [theta2_up, theta2_down]:
            # Compute theta1
            k1 = self.L1 + self.L2 * np.cos(theta2)
            k2 = self.L2 * np.sin(theta2)
            theta1 = np.arctan2(y, x) - np.arctan2(k2, k1)
            solutions.append((theta1, theta2))

        return solutions
Step 3: Visualize the Robot Arm
def plot_arm(arm, theta1, theta2, target=None):
    """Visualize the robot arm configuration."""
    positions = arm.forward_kinematics(theta1, theta2)

    fig, ax = plt.subplots(1, 1, figsize=(8, 8))

    # Draw links
    points = [positions["base"], positions["elbow"],
              positions["end_effector"]]
    xs = [p[0] for p in points]
    ys = [p[1] for p in points]

    ax.plot(xs, ys, "o-", color="#3385ff", linewidth=3,
            markersize=10, markerfacecolor="#06b6d4")

    # Draw base
    ax.plot(0, 0, "s", color="#111118", markersize=15)

    # Draw target if provided
    if target:
        ax.plot(target[0], target[1], "x", color="#ef4444",
                markersize=15, markeredgewidth=3)

    # Annotations
    ex, ey = positions["end_effector"]
    ax.annotate(
        f"({ex:.2f}, {ey:.2f})",
        xy=(ex, ey), xytext=(10, 10),
        textcoords="offset points", fontsize=10
    )

    # Formatting
    max_reach = arm.L1 + arm.L2
    ax.set_xlim(-max_reach - 0.3, max_reach + 0.3)
    ax.set_ylim(-max_reach - 0.3, max_reach + 0.3)
    ax.set_aspect("equal")
    ax.grid(True, alpha=0.3)
    ax.set_title(
        f"θ₁={np.degrees(theta1):.1f}°, θ₂={np.degrees(theta2):.1f}°"
    )

    plt.tight_layout()
    plt.show()


# Example usage
arm = TwoLinkArm(link1_length=1.0, link2_length=0.8)

# Forward kinematics: set joint angles, see where end-effector goes
plot_arm(arm, theta1=np.radians(45), theta2=np.radians(30))

# Inverse kinematics: set target, compute joint angles
target = (1.2, 0.5)
solutions = arm.inverse_kinematics(*target)
for i, (t1, t2) in enumerate(solutions):
    print(f"Solution {i+1}: θ₁={np.degrees(t1):.1f}°, θ₂={np.degrees(t2):.1f}°")
    plot_arm(arm, t1, t2, target=target)
Step 4: Workspace Analysis
The workspace is the set of all points the end-effector can reach:
def plot_workspace(arm, resolution=200):
    """Visualize the robot's reachable workspace."""
    theta1_range = np.linspace(-np.pi, np.pi, resolution)
    theta2_range = np.linspace(-np.pi, np.pi, resolution)

    x_points = []
    y_points = []

    for t1 in theta1_range:
        for t2 in theta2_range:
            pos = arm.forward_kinematics(t1, t2)
            x_points.append(pos["end_effector"][0])
            y_points.append(pos["end_effector"][1])

    fig, ax = plt.subplots(1, 1, figsize=(8, 8))

    # Plot workspace as scatter
    ax.scatter(x_points, y_points, s=0.1, alpha=0.3, color="#3385ff")

    # Draw reachability boundaries
    outer = plt.Circle((0, 0), arm.L1 + arm.L2,
                       fill=False, color="#06b6d4", linewidth=2,
                       linestyle="--", label="Max reach")
    inner = plt.Circle((0, 0), abs(arm.L1 - arm.L2),
                       fill=False, color="#ef4444", linewidth=2,
                       linestyle="--", label="Min reach")
    ax.add_patch(outer)
    ax.add_patch(inner)

    ax.set_aspect("equal")
    ax.legend()
    ax.set_title("Robot Arm Workspace")
    ax.grid(True, alpha=0.3)
    plt.tight_layout()
    plt.show()


plot_workspace(arm)
Step 5: Animation
Animate the arm moving to different positions:
from matplotlib.animation import FuncAnimation

def animate_arm(arm, targets):
    """Animate the robot arm moving between target positions."""
    fig, ax = plt.subplots(1, 1, figsize=(8, 8))
    max_reach = arm.L1 + arm.L2

    # Pre-compute all solutions
    all_angles = []
    for target in targets:
        solutions = arm.inverse_kinematics(*target)
        all_angles.append(solutions[0])  # Use elbow-up solution

    # Interpolate between configurations
    frames_per_move = 30
    interpolated = []
    for i in range(len(all_angles) - 1):
        for t in np.linspace(0, 1, frames_per_move):
            t1 = all_angles[i][0] + t * (all_angles[i+1][0] - all_angles[i][0])
            t2 = all_angles[i][1] + t * (all_angles[i+1][1] - all_angles[i][1])
            interpolated.append((t1, t2))

    def update(frame):
        ax.clear()
        t1, t2 = interpolated[frame]
        pos = arm.forward_kinematics(t1, t2)

        points = [pos["base"], pos["elbow"], pos["end_effector"]]
        xs = [p[0] for p in points]
        ys = [p[1] for p in points]

        ax.plot(xs, ys, "o-", color="#3385ff", linewidth=3,
                markersize=10, markerfacecolor="#06b6d4")
        ax.plot(0, 0, "s", color="#111118", markersize=15)

        # Draw all targets
        for target in targets:
            ax.plot(*target, "x", color="#ef4444",
                    markersize=10, markeredgewidth=2)

        ax.set_xlim(-max_reach - 0.3, max_reach + 0.3)
        ax.set_ylim(-max_reach - 0.3, max_reach + 0.3)
        ax.set_aspect("equal")
        ax.grid(True, alpha=0.3)

    anim = FuncAnimation(fig, update, frames=len(interpolated),
                        interval=33, repeat=True)
    plt.show()
    return anim


# Animate moving between targets
targets = [(1.0, 0.5), (0.5, 1.2), (-0.8, 0.6), (1.2, -0.3), (1.0, 0.5)]
animate_arm(arm, targets)
Key Takeaways
- Forward kinematics (FK) is straightforward — just chain transformations
- Inverse kinematics (IK) can have multiple or no solutions
- Workspace analysis helps you understand a robot's capabilities
- The law of cosines gives analytical IK for simple arms
- For complex robots (6+ joints), numerical IK methods are used
Next Steps
- 3D kinematics — extend to 3 dimensions with rotation matrices
- DH parameters — the standard way to describe robot geometry
- Jacobians — relate joint velocities to end-effector velocities
- Dynamics — add forces and torques to the kinematic model
- Motion planning — plan collision-free paths for the arm
In our next tutorial, we'll extend this to 3D and work with a simulated robot arm in PyBullet.
Related Posts
Getting Started with ROS 2: Your First Robot Application
A beginner-friendly guide to setting up ROS 2 Jazzy, understanding core concepts like nodes and topics, and building your first publisher-subscriber application.
Building a Computer Vision Pipeline with OpenCV and Python
Learn to build a complete computer vision pipeline from scratch using OpenCV and Python. Covers image processing, feature detection, object tracking, and deploying your pipeline for real-time video analysis.
OpenAI Partners with Leading Robotics Firms to Bring GPT Models to Physical Robots
OpenAI has announced strategic partnerships with Boston Dynamics, Agility Robotics, and Figure AI to integrate its latest GPT models into humanoid and quadruped robots.
AI-Powered Surgical Robots: How Artificial Intelligence is Revolutionizing Modern Medicine
Explore how AI-driven surgical robots are transforming healthcare with unprecedented precision, shorter recovery times, and better patient outcomes. From the da Vinci system to fully autonomous procedures.